Difficulty Level: VERY easy
Materials:
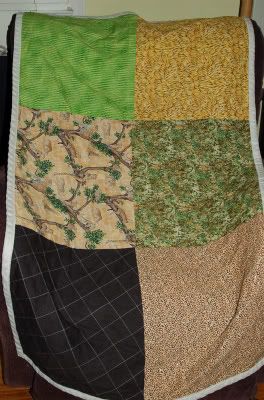
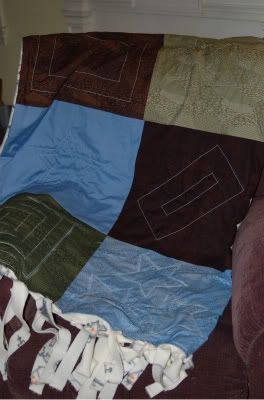
6 fat quartersCreate your rows:
3/4 - 1 yard of fleece for backing
2 packages quilt binding
2" wide ruler
Fabric chalk or pen
Iron your fat quarters so they are wrinkle free. Pair up two pieces to be side by side. Pin them, right sides together and sew 1/4" seam allowance. Iron seam towards the darker material. Continue this for the remaining four fat quarters.
Sew the rows together:
Placing right sides together, match up your center seams for your first two rows and sew them together with 1/4" seam allowance. Do the same with your final row. Iron your seams to the darker material side if possible.
Baste your top and backing together:
Crazy Mom Quilts has the best basting tutorial I've found.
Mark off your lines and sew them:
Lay out your quilt, smooth it very well and lay your ruler out diagonally. Mark that line on your material from one edge to the other. Without moving the ruler, mark the other side of the ruler so you're lines are now 2" apart. You don't have to mark the entire quilt at once. Mark as much as you want to sew at a time.
Once you have sewn all your diagonal lines in one direction, it's time to quilt the other direction. Start marking your lines again. You can have your diamonds as long or as square as you want. It's totally up to you.
Square it up and trim the excess:
Squaring up the quilt and trimming off the excess is the hardest part for me. I don't have a great method for this yet but here's what I do. I smooth out the quilt on my table, lay out a guide ruler and use my rotary cutter to trim off a straight edge. I try to keep it even and square but mostly I guess.
Sew the binding:
You have two choices - you can purchase quilt binding or you can make your own. I've not attempted to make my own yet but I hope to do it on one of my next projects. Again, I point you to Crazy Mom Quilts for an excellent tutorial on how to make your own binding. I think a custom binding can give a quilt a nice finished look, but it's not necessary so don't beat yourself up if you use store bought binding. Pin your binding to your quilt and sew it on.
Voila'! Wash and dry it and you're done!


2 comments:
Nice. Now I know whose blog to read when I need quilting advise. :)
This is a nice blog. If you are in Etsy check out our Quilts and Heirlooms team.
http://quiltsandheirlooms.blogspot.com/
Post a Comment